3 Most Effective Ways to Detect Water Leaks

You don’t know how to effectively detect water leaks? Currently, there are many causes of water leaks. Therefore, if not addressed in time, the consequences can be serious and long-lasting, causing damage to the structure. Let’s take a look at the following measures to fix this issue.
1. Causes of water leaks


For regular water pipes, it’s easy to detect when there is a water leak. However, for concealed pipes, this is more challenging. Some signs to recognize water leaks in concealed pipes are:
- Yellow or dark brown streaks appearing on the wall, which are aesthetically unpleasing.
- Discoloration of the wall with some areas darker and others lighter, along with signs of water seeping on the wall surface.
- A sudden increase in the water bill, despite no change in water usage.
- The water meter keeps running continuously even when not in use.
- Weak water pressure, even when only one faucet is turned on.
3. Methods to Detect Water Leaks

There are several methods to detect water leaks in concealed pipes that you can refer to. Among them, the following 4 methods are common and widely applied.
3.1 Manual Leak Detection
- Identify humidity on the wall: The area with a leak will be more damp than the surrounding areas. Therefore, you only need to mark the area and then find a way to fix the concealed pipe.
- Wall discoloration and mold growth: The wall area with a leak will have a lighter color and may show stains or mold due to prolonged water seepage.
- Check for structural changes in the wall: When the wall is soaked with water, its structure will change, such as plaster coming off, peeling drywall, or the formation of bulging bubbles.
- Listen for dripping sounds: If you suspect any area might have a leak, press your ear to the wall to listen. If you hear a dripping sound or hissing noise from inside, that area is likely leaking water or even has a broken pipe.
3.2 Using Wall Moisture Detection Devices

This is also an effective method to detect leaks in concealed pipes. These devices can measure on various materials such as wood, concrete, drywall, and walls. Based on the readings from the device, you can easily determine the location of water seepage, allowing you to take appropriate action to resolve the issue.
3.3. Installing a Smart Water Leak Detection System


Once the pipe repair is completed, the next step is to patch the wall you have broken. Patching the wall helps make the house look better, leaving no signs that repairs have been made.
4.2 Rerouting the New Water Pipe
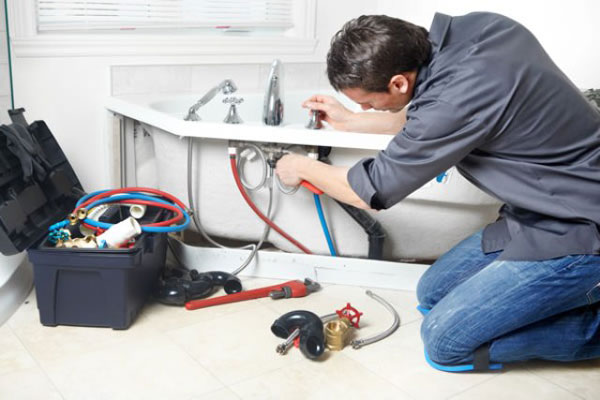
For areas that are difficult to break open or have been severely damaged, you will need to replace them with new pipes.
Step 1: Identify the leaking area
You can identify the location using the signs we previously introduced. However, for systems located beneath beams or foundations, it is very difficult to locate the leak, so you need to accurately pinpoint the leaking area to avoid unnecessary damage to other parts of the structure
https://www.nhuahoasen.vn/top-5-cac-nha-may-san-xuat-ong-nhua-uy-tin-nhat
New post

5 Smart Home Trends You Can’t Miss in 2025
5 Smart Home Trends You Can’t Miss in 2025 Smart home technology is entering a new era with breakthroughs in AI, automation, security, and green energy. 2025 promises significant changes in how we live and interact with our homes. Here are five smart home trends you can’t afford to miss! 1️⃣ Matter Connectivity Standard –...

Introducing BTicino Product Line by Legrand
Introducing BTicino Product Line by Legrand BTicino is a leading high-end electrical brand from Italy, offering a perfect combination of luxurious design and advanced technology. The BTicino product line not only elevates living spaces but also brings a distinct level of sophistication to every home and business. Why Choose BTicino? Modern and Luxurious Design BTicino...